



If you want to build scalable, data-driven pages in HubSpot, HubDB is your most powerful tool.
Instead of creating 100s of pages manually,HubDB lets you generate dynamic pages from structured data — perfect for directories, listings, events, locations, and more.
Understanding how to build dynamic pages using HubDB in HubSpot Content Hub can completely change how you approach website development.
What Is HubDB? (Quick Recap)
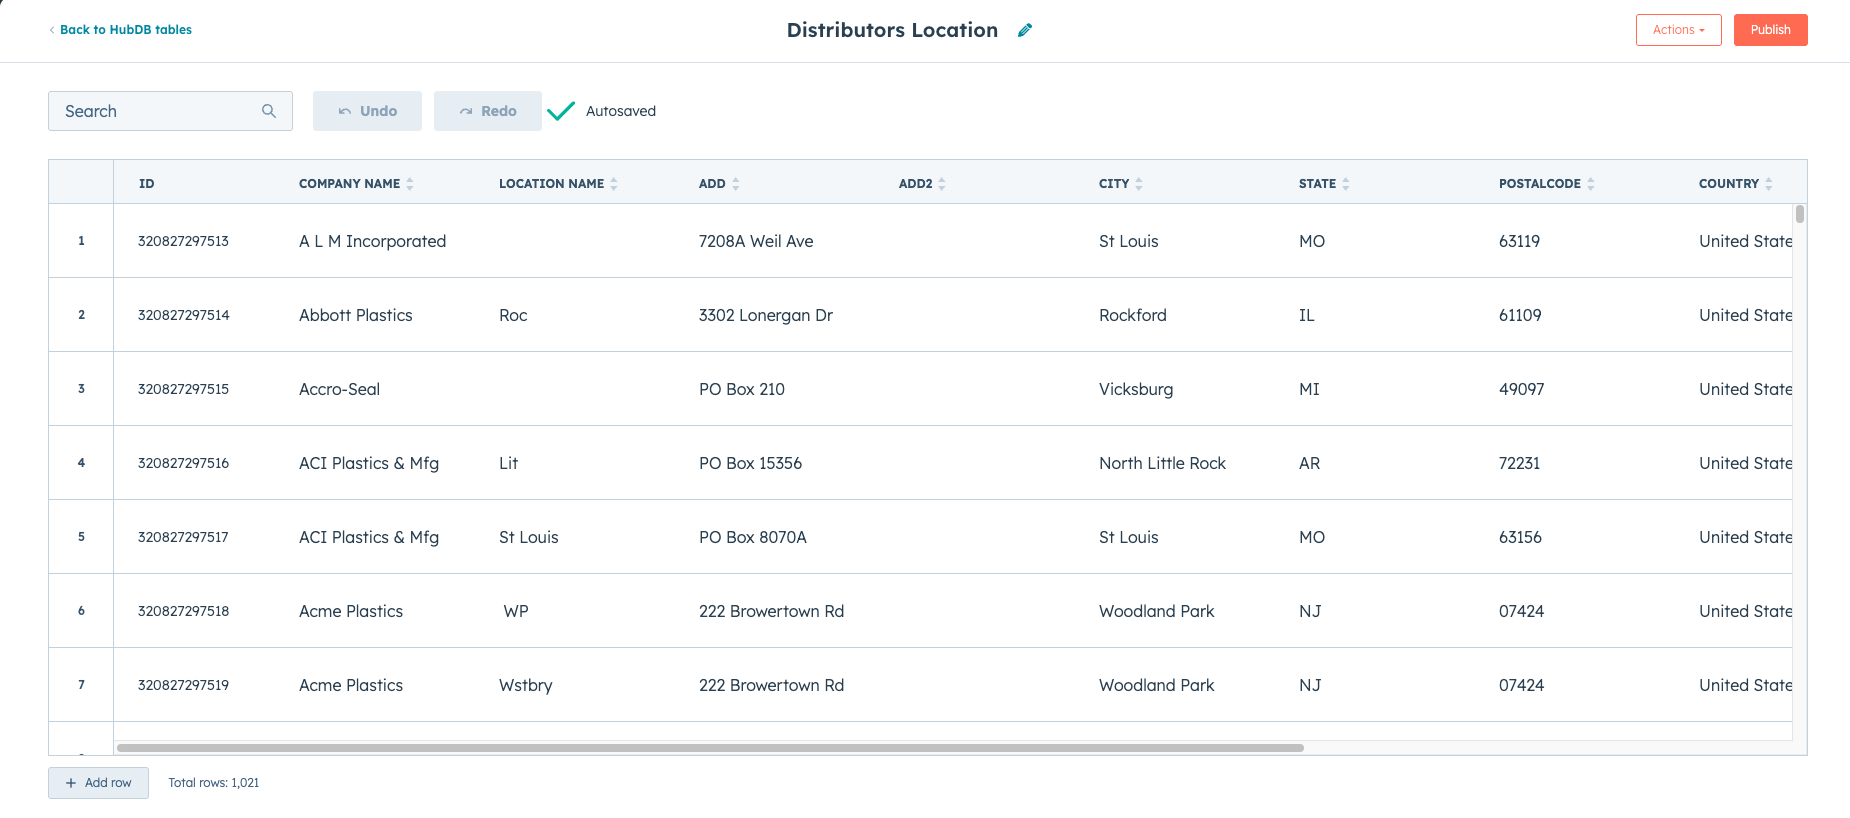
HubDB is HubSpot’s database tool that allows you to store structured data in tables.
Each table contains:
- Rows → individual entries (e.g., schools, events)
- Columns → data fields (e.g., name, location, category)
You can then use this data to dynamically generate pages.
When Should You Use HubDB?
Use HubDB when you need to:
- Create listing pages (schools, courses, products)
- Build directories (locations, services)
- Manage frequently updated data
- Avoid manually creating multiple pages
👉 Example (very relevant to you):
BeeBuddy-style school listings or summer camp directories
🧩 STEP 1: Create a HubDB Table
- Go to Content → HubDB
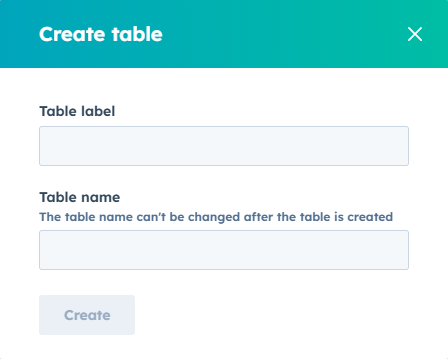
- Click Create Table
- Add columns like:
Name (Text)
Location (Text)
Category (Dropdown)
Image (Image)
Slug (Text)
4. Add rows (each row = one item/page)
🧱 STEP 2: Create a Dynamic Page Template
Go to:
👉 Content → Design Manager
Create a new template and add this:
{% set row = dynamic_page_hubdb_row %}<h1>{{ row.name }}</h1>
<p>{{ row.location }}</p>
<img src="{{ row.image.url }}">
This template will be used for all dynamic pages.
🔗 STEP 3: Enable Dynamic Pages
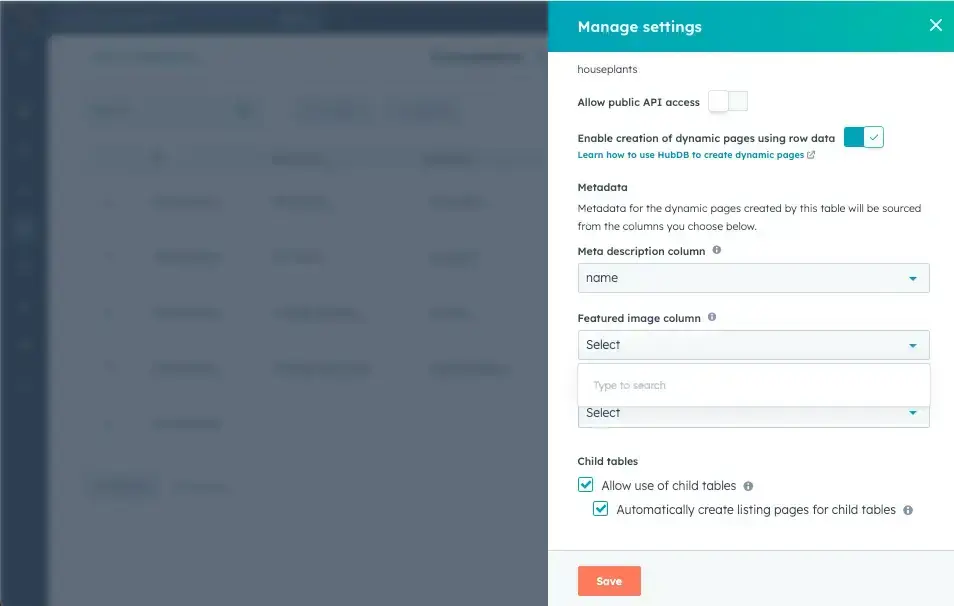
- Go to your HubDB table
- Click Enable Dynamic Pages
- Select your template
- Map the slug column
Example output:
yoursite.com/schools/dps-delhi
yoursite.com/schools/modern-school
🔁 STEP 4: Create Listing Page
Now create a main listing page:
{% set rows = hubdb_table_rows(123456) %}
{% for row in rows %}<a href="{{ request.path }}/{{ row.slug }}">
<h3>{{ row.name }}</h3>
</a>
{% endfor %}
This creates a directory linking to all dynamic pages.
🔍 STEP 5: Add Filters (VERY IMPORTANT)
Example: Filter by location
{% set location = request.query_dict.location %}{% set rows = hubdb_table_rows(123456, "location=" ~ location) %}
👉 This allows URLs like:
?location=Delhi
🧠 STEP 6: Add SEO Fields
Add columns in HubDB:
- Meta Title
- Meta Description
Then use:
{% set row = dynamic_page_hubdb_row %}<title>{{ row.meta_title }}</title>
<meta name="description" content="{{ row.meta_description }}">
👉 This is crucial for programmatic SEO
⚡ STEP 7: Optimize Performance
Best practices:
- Limit rows per page
- Use filters instead of loading everything
- Optimize images in HubDB
- Avoid heavy logic inside loops
🎯 REAL-WORLD USE CASES
You can build:
- 🏫 School listing website (BeeBuddy style)
- 📅 Event directories
- 🛍 Product catalogs
- 📍 Location-based landing pages
- 📚 Resource libraries
🚀 PRO TIPS (From Real Projects)
- Always include a slug column
- Keep table structure simple initially
- Use HubDB for scalability, not static content
- Combine with filters → powerful UX
📌 Key Takeaway
HubDB allows you to create dynamic, scalable websites inside HubSpot Content Hub without manually building each page. By combining structured data with dynamic templates, you can build powerful listing platforms, directories, and SEO-driven page networks.
Have a Project in Mind?
Let’s talk about what you need and how we can make it happen.

Leave a reply